

Sunday, April 6, 2014
California - American River
Sunday we walked across the Folsom bridge and headed down to the water. The boys took of their shirts and shoes and swam in the water and later we attempted to teach them how to skip rocks, which we failed, and spent the next hour trying to get our own rocks to skip. The weather was 81 degrees- gorgeous. Sunshine has never felt so warm!
California Easter Egg Hunt
We are in California visiting and grandma did a fun egg hunt with the kids. Even Aubrey held her own and filled up her bag with eggs. The kids loved looking for eggs and even had fun hiding eggs for each other after. It's no surprise that the kids love coming here. There are always so many fun surprises for them. We love being here.

Thursday, April 3, 2014
Family Date Night
We took the kids to dinner which is always... Interesting. Tried to get a picture of all 3 of them together. This was about as good as it got. As crazy as it is sometimes I am so thankful for my sweet kids and our little family! Couldn't love them more!!

Morning snuggles
Nothing could start my day better than walking downstairs to find this. She sure is one lucky little sister!!

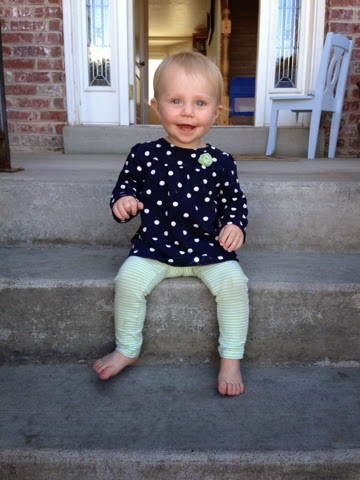
Sunday Best
Jared's Aunt brought Aubrey this adorable little outfit and headband this weekend. Aubrey wore it for the 1st time to church and looked the cutest little thing ever!! She sure does get spoiled with cute things!! Must be a girl thing. 
Special bond
These 2 have always had a sweet thing between them. The other day Aubrey climbed onto the couch, gave Tyson a hug, and then decided to just stay there snuggled in his arms. It was so sweet.

Outside
This little one wants to be outside all the time. She has figured out how to climb out the front door and is even starting to slide down the stairs on her tummy. This mama is in trouble!! I need a screen door so I can keep an eye on the kids outside and keep this one inside!!
Soccer Saturdays
Porter and Tyson are on the same soccer team for this spring season. It will probably be the only time this will happen. One of the boys on Porters team broke his arm and they needed an extra player. Tyson was SOOO excited. He scored three times this day. It's so funny to see a bunch of 6 year olds chasing a 3 yr old who dribbles across the whole field and scores. And porters reactions are priceless. He would run and pick Tyson up in the air and carry him back to the line. I love these boys and I love their relationship with each other. We celebrated at their choice, Taco Bell. :)
 I
I
I Sleeping beauty!
This is what happened when I tried to push back nap time past lunch. Walked outside to pick up porter off the bus and came in to find her fast asleep, corn dog still in hand. :)

Saturday, March 8, 2014
DIY Tutorial - Making Curtain Rods with PVC
I've been making the most beautiful curtains for my front room, I am excited to show them off - but more on that later. First I needed a rod to hang these beauties on. I started to look online for bay window curtain rods and they are a pretty penny... more than I wanted to spend. I did a little searching online, combined a few ideas that other people had and ended up making my own curtain rods for around $10. That's one curtain rod for a regular window, and another for my bay window for a killer price. Boo yeah!


Shopping List:
- 2 - 1/2 inch PVC conduit ($1.48/pc at Home Depot)
- 2 - 1/2 inch 45 degree PVC elbow pieces ($0.68/pc at Home Depot)
- 1 - Bag of 3/4" One Hole Straps - 4 in a bag - next to PVC Conduit ($0.99 at Home Depot)
- 1 - 1 Can Rustoleum Oil Rubbed Bronze Spray Paint ($6.60 at Home Depot)
- 2 - 11/16 x 17/32 Sealing Corks ($0.68/pc at Lowes in Hardware drawers - not sold at Home Depot)
- 1 - Package of 1/4" x 1 1/2" wood dowell screws ($0.99 at Home Depot)
- 1 - Bag of Wooden Ball Knobs 1 3/4" size - 6 in bag - for finials ($3.99 at Hobby Lobby (or) $2.40 with 40% off coupon)
- 1 - 4-pack of 1" corner braces ($1.99 at Home Depot)
Step 1- Measure the width of the middle section of your bay window. Subtract 5 inches from that number and that is what you are going to cut your first piece of PVC to. (Why subtract 5 inches? You need to subtract 3.5 inches from each side for the elbow pieces. Then you need to add 2 more inches because 1 inch of each end of PVC will be lost when it slides into those elbow pieces.) Cut your 1st middle piece. It should have straight edges on both ends.
Step 2 - Place your cut PVC on the ground below your window and slide the elbows into place. Make sure that the curves match up correctly. Assuming all is well, you can now take your outside bay window measurements and subtract 2.5" and cut. (Again, subtract 3.5 inches for the elbow, and add the 1" that will slide into the elbow.) Slide them into place and make sure it fits the wall correctly.
Step 3 - Next you are going to want to pull out your "one hole straps" and your "corner braces". You are now going to make the brackets that will attach your rod to the wall. You will need some small screws and nuts to hold these together. I had some at the house.

 They should look like this when they are put together. Once you are done, set those aside.


 Here is a close-up of what the finish looks like dried.


Step 4 - Next you will want to take out your dowell screws, and your wooden balls that will be your curtain finials. Using pliers hold your dowell tightly in the middle of the screw. With your opposite hand screw the wooden ball onto the dowell until it meets the middle.
Hold the dowell screw with pliers while you twist the ball onto the screw.
Step 5 - Next pull out your corks, and hammer them into the ends of your PVC pipe. This will give you somewhere to screw your finials into.
Step 6 - Grab some newspapers and all of your parts and head outside to spray paint. I found it helpful to get an old shoe box lid to stick my finals into while I painted them. Again, I used Rustoleum Oil Rubbed Bronze which gave it a metallic finish and turned it from plastic PVC to a realistic looking metal rod. It takes about 30 minutes to dry, and I applied a second coat.
Step 7 - Once everything is dried, grab your ladder, and a drill. Using a stud finder, or the good old knocking method, find a stud and drill your brackets into the wall. I chose to hang mine as close to the ceiling as possible to make the room appear taller. (Tip: Instead of measuring every time to make sure it's even, get a piece of cardstock paper and cut a template to hold up against the wall to make it the same every time.)
After all your brackets are in place, hang your rod on! And of course, don't forget to screw the finials into the end!
Wa- laaa! Beautiful looking curtain rods a great price!!
Saturday, December 28, 2013
Thanksgiving 2013
We had a wonderful Thanksgiving in California this year, once again. It is always so wonderful to be back in California in the gorgeous weather and around family we love and miss! We dream of one day being able to enjoy these times on a regular basis. Maybe one day!!
 |
| Kyle and the beast! Sasha |
 |
| Building snowboards and skate boards with Uncle Kyle |
 |
| The drive!! |
 |
| Thanksgiving Day |
 |
| At the park visiting friends! |
Neighborhood Friends
A house full of kids is what you will find at our house most afternoons. The boys have been blessed with lots of kids in their little neighborhood and they spend hours together every day. I torture myself by posting these pictures now, when the backyard is covered in 2 feet of snow. Now they are cooped up inside doing their flips and tricks on couch cushions instead. :)


Porter's 6th Birthday Party
Back in November Porter had his 6th birthday. I am in denial, I don't know how he is already six years old! My days of attempting elaborate birthday parties are long gone. I no longer have the energy, time or desire to sit behind a sewing machine and create darling little party favors and create the cute little parties that I have tried to do in the past. This year we kept things simple, we took all the kids to Classic Fun Center in Orem where the kids did the skating rink, bounce house, and climbing gym. They let me bring in my own cake and party favors and the kids got to play for an hour and a half for only $2/kid. It was the BEST birthday party ever, and I spent a week wondering why in the world I didn't do this sooner? It was so fun to be able to have a party that was fun for my son and all his little friends, and not have any stress or mess. We loved it! Happy Birthday to the most creative little guy I know!


Our little sunshine!
My boys don't always wake up happy, so to see this cute face after naps is always refreshing! Finally one day when I heard her wake up (aka chatting in her bed) I grabbed my camera and caught this little doll in one of my favorite times of the day!!


Subscribe to:
Posts (Atom)